Showing posts with label Virago Cafe Racer Project. Show all posts
Showing posts with label Virago Cafe Racer Project. Show all posts
Wednesday, December 5, 2012
Virago cafe still under the knife
Stopped up at Cafe Racer Ypsi last night to see how the engine build was going and install the Yamaha tuning fork stickers on the tank. Both are doing sweet. John is doing a super nice job on the engine and it will compliment all of my fabrication well.
Monday, November 19, 2012
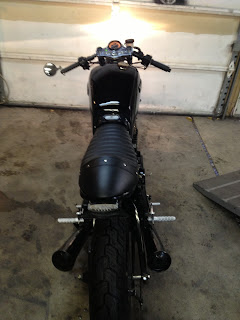
My Part Of the Virago Cafe Racer is Done
He also ordered everything to add dual disc brakes to the front, a wise move.
From here it is going to go over to Cafe Racer Ypsi for the engine work and the remainder of the polishing. He also has a 2 into 1 or a exhaust similar to that on the Doc Chops bike that we are going to install.
Wednesday, November 14, 2012
Tuesday, November 13, 2012
Thursday, November 8, 2012
Tuesday, November 6, 2012
Sneak Peek Virago # 2
I got the front fender on at least. I sanded through on the tank while I was color sanding it so its back in the booth until it has learned its lesson. The red looks pretty sweet on the black bike. If it was mine I would black out the wheels too. I did finally get the brake line in for it so that is all good now.
Monday, November 5, 2012
Weekend stuff
Some paint and body stuff over the weekend . I finished the bodywork and sealed up the benelli tank for the first Virago. Did some mods to the back of the other Virago tank and painted it. I'm not in love with the color but the customer was very specific so my guess is that it matches something that I'm not aware of yet and red always looks good on a otherwise blacked out bike.
Friday, November 2, 2012
The upper Triple
Jesse ( the owner ) wasn't in love with the pocket milling on the upper triple so we simply flipped it over. Still looks sweet and he is happy.
Something about this group of pictures really came out nice, I'm really liking my new camera.
Thursday, November 1, 2012
Wednesday, October 31, 2012
Virago # 2 is done ...... Except paint
Done!! except for the paint, front brake line and the burnt out led tail lamp. I should be getting the brake line today or tomorrow and it only takes a few minutes to vacuum bleed the brakes. As for the tail lamp, I cant bolt the seat on all the way until I get that all plugged in and happy. It seems to run pretty good, starts right up with a tap of the start button, although the starter sounds like it has seen better days.
I have to say that I started doing these Virago's with a bad attitude and Ive really grown to like them .
Oh, and happy Halloweener !
Monday, October 29, 2012
The purple nurple Virago
Over the weekend we made the upper triple, headlamp mount, air filter adaptor, painted the headlamp and wired the whole thing...... I'm very tired now. All I need is a brake line and the tail lamp that was not working from Emgo. Im going to hose the dust off of it today.
Wednesday, October 24, 2012
Virago wires, I know its boring but I got nothin otherwise
So this is the whole harness, not much to it really . I dont often run turn signals and that takes more time than it sounds like . On a good note I picked up the parts to complete the other Virago last night so I can finally get that done this week. maybe free up a hoist so I can get back to choppin my Harley.
Tuesday, October 23, 2012
More wire
I wouldn't even bother showing this stuff normally, but its better than nothing I guess.
The shot on the bottom is the stuff that I'm eliminating from the harness.
My daughter took these pictures, thats why they don't suck as much as mine usually do.
Monday, October 22, 2012
I Love Making Sense Of Wiring
What a mess..... Most of this wiring is redundant bullshit . There is a switch for the side stand that is connected to relay thats connected to the clutch switch thats connected to a relay thats connected to the neutral switch and everything has a indicator lamp that takes a wire. All of this bullshit is going so I am working on a simplified wiring diagram. I will post that after I am done with it so the rest of the world does not have to suffer.
Thursday, October 18, 2012
The other Virago and a shop shot
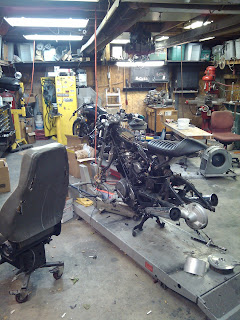
I was busy finishing up the last of the parts that I am doing for the SEMA show in the paint booth ( Not shown ) and fiddling with the wiring on the Virago Cafe Racer Projects. The shop is a disaster area but soon .
Wednesday, October 17, 2012
Inspiration
Doc Chops did a very nice job on their version of the cafe cut Virago. The wheels are not finacialy feasible to hunt down, machine and lace, but they are awesome indeed. I talked to Cafe Racer Yesterday and they should have the wheels back from powder on Friday . So maybe I will be able to get Jesse's on wheels so we can get the stance finalized.
As for the other Virago that is aging on my hoist waiting for a headlight and hand controls and wiring.
....... Stupid wiring.
Friday, October 12, 2012
Virago Cafe Racer Progress
New Clip ons in the mail yesterday. Adjustable and pretty nice parts, nice find Jesse!
I designed the upper triple tree last night and speedometer bracket. I will cut them out this weekend.
Wednesday, October 10, 2012
More Virago Stuff
Mostly shaping the tank extension and mounting it 100% last night. On to the wiring....Yay!
In the meantime I'm also juggling some more paint work for Ford Racing that will be at the SEMA show and a couple of other little paint jobs.
Tuesday, October 9, 2012
Rearsets for Virago and XS650 with Linkage
I put together the universal linkage kit last night.
Basically they consist of of 6061 T6 Aluminum tubing with some high strength 1/4-28 Rod running through the center that you can cut to what ever length you come up with. The rod ends are high quality steel. They come with jam nuts and stainless nuts and bolts to bolt onto your modified shift lever and brake lever.
The installation plan is that you can mock it all up using the threaded rod being sure to keep as much thread engagement as possible into the rod ends. After that disassemble the ends from the threaded rod and measure the rod length. To cut the aluminum tube simply subtract 2 inches from the threaded rod length and cut. Be sure to tighten the jam nuts onto the tube to about 10 - 15 foot lbs. because the tension compression of the tube and rod adds to its strength and is most important on the brake side. This is the cleanest way to make your own linkage if all you have is a hack saw and a drill . If you want you can brush, anodize or polish the aluminum tube for a custom look.
I have a set up at Cafe Racer Ypsi on display if you need to touchy feely a set.
Monday, October 8, 2012
More Virago Cafe Stuff
Just a couple of mods to the tank to help it fit the giant back bone box. I have the lights mounted and now its on to designing the upper triple and cutting it out on the CNC. after that its just wiring.
Subscribe to:
Posts (Atom)


.jpeg)


